Quick Start
This guide requires Python programming (classes, functions, NumPy basics) and basic linear algebra (matrix multiplication).
The Journey
TinyTorch follows a simple pattern: build modules, unlock milestones, recreate ML history.
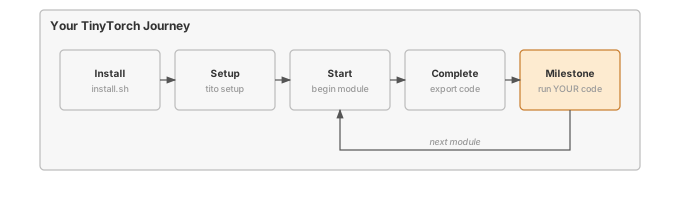
As you complete modules, you unlock milestones that recreate landmark moments in ML history—using YOUR code.
Step 1: Install and set up (about 5 minutes)
You need Python 3.10 or newer, git, and a terminal. New to terminals, virtual environments, or Jupyter? The Glossary starts with a short section on each. Run these from the folder where you keep projects:
curl -sSL mlsysbook.ai/tinytorch/install.sh | bash
cd tinytorch
source .venv/bin/activate
tito setup
tito system health
TinyTorch runs on Windows in Git Bash, which comes with Git for Windows. Install it with the default options, open Git Bash from the Start menu, and run:
curl -sSL mlsysbook.ai/tinytorch/install.sh | bash
cd tinytorch
source .venv/Scripts/activate
tito setup
tito system health
To download and test the latest development preview currently on the dev branch:
curl -sSL mlsysbook.ai/tinytorch/install.sh | bash -s -- --dev
cd tinytorch
source .venv/bin/activate
tito setup
tito system health
The installer prints [branch: dev] while it runs. If you do not see that line, the published copy of the script is an older build that ignores --dev and you have main instead; run git -C tinytorch branch --show-current to confirm which branch you got.
The installer checks for Python and git, downloads TinyTorch into a tinytorch/ folder, creates a virtual environment in tinytorch/.venv (a private copy of Python and its packages, so TinyTorch cannot clash with anything else on your machine), and installs everything into it. tito system health should then show every item green. If anything is not green, it names the problem and exits with status 1; the Troubleshooting page covers the usual fixes:
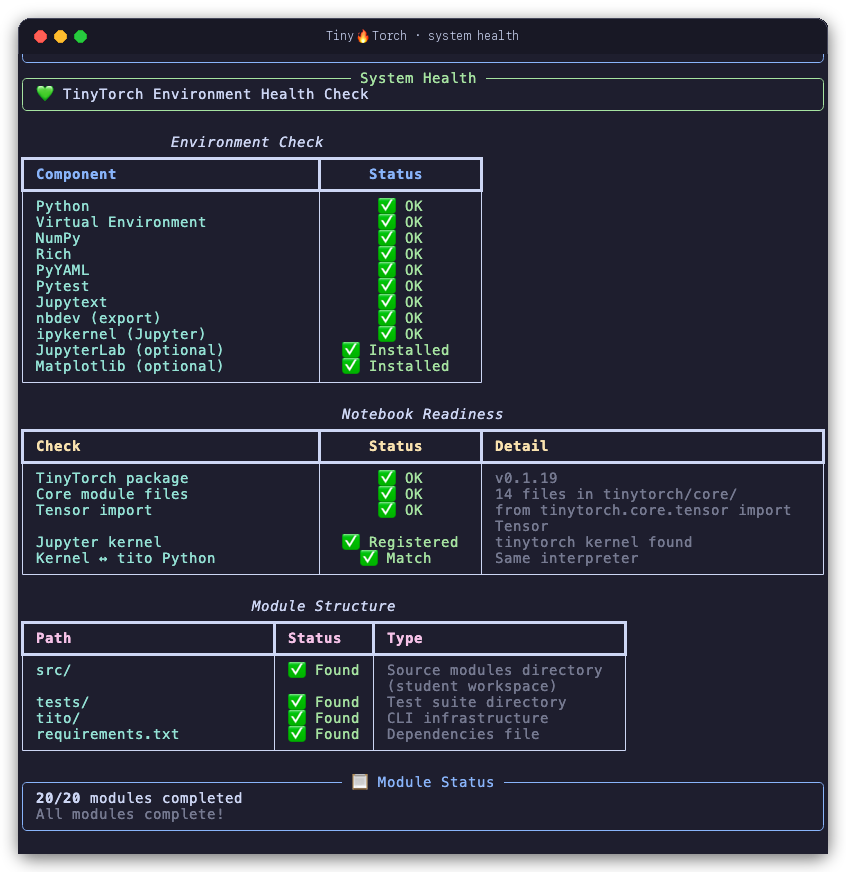
tito system health validates your Python installation, virtual environment, core dependencies, Jupyter kernel registration, and package exports.
The virtual environment is active only in the terminal where you activated it. Each time you open a new terminal, run cd tinytorch and source .venv/bin/activate (on Windows, source .venv/Scripts/activate) before any tito command. If you see tito: command not found, this is almost always why.
If a new release is published or your instructor asks you to pull updates, do not reinstall. Inside your tinytorch directory with the virtual environment activated, run:
tito update # or: tito system updatetito automatically snapshots your progress and notebooks before updating test suites, CLI tools, and starter templates. Your completed work in modules/, your exported code, and your progress history are strictly preserved.
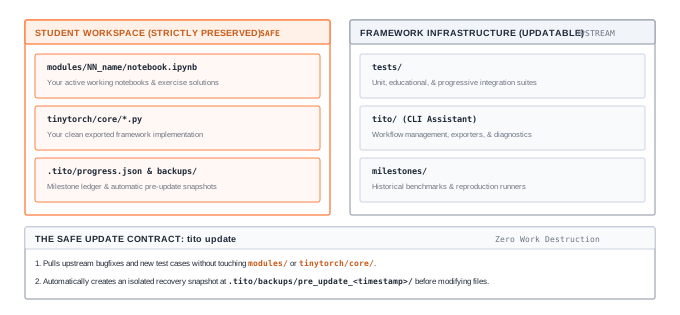
modules/), exported packages (tinytorch/core/), and completion ledgers (.tito/) are sovereign and never touched by updates. Upstream test suites and CLI tools update safely with automated pre-update backups.
Step 2: Your first module (about 4 to 6 hours)
Module 01 builds the tensor, the data structure everything else is made of.
tito module start 01This creates your notebook, modules/01_tensor/tensor.ipynb, and opens it in Jupyter Lab, a notebook editor that runs in your browser. Keep the terminal open while you work; closing it stops Jupyter.
In the notebook, run the cells from top to bottom (Shift+Enter runs one cell). By default, tito module start 01 opens the notebook with every solution already filled in, so you can read and run it end to end. To write the code yourself, start with tito module start 01 --exercise instead (or, if you already started the module, tito module reset 01 --exercise): three functions are then left as # YOUR CODE HERE stubs, and each is followed by a test cell that tells you whether it works. The Module 01 page lists them and explains the messages you may see.
If you prefer working in VS Code or Cursor instead of a browser tab, open the tinytorch directory in your editor, open modules/01_tensor/tensor.ipynb, and select the .venv kernel (top right in VS Code: Select Kernel → Python Environments → .venv).
Want to work through the modules as blank homework assignments? Run tito module start 01 --exercise (or --assignment) to strip solutions and generate empty implementation stubs.
You can run your tests directly inside the notebook, or from the terminal at any time:
tito module test 01 # runs your notebook's tests without exportingWhen all tests in your notebook pass, finalize and export your implementation:
tito module complete 01complete runs your notebook’s tests again, copies your code into the tinytorch package (this is called exporting), runs a second set of tests against the package, and records the module as done. After that your code is importable:
from tinytorch.core.tensor import Tensor  # your implementation
x = Tensor([1, 2, 3])
Coming back another day, reopen your notebook with tito module resume 01.
TinyTorch pairs this hands-on workbench with an explanatory textbook:
- The Workbench (This Site & Notebooks): Where you implement code, run tests, and export modules via
tito. - The Textbook (TinyTorch Book PDF): Where the mechanisms are explained. Every module has a matching chapter in TinyTorch: From Tensors to Transformers that walks through The Problem, The Idea, The Code, A Worked Trace, and From TinyTorch to Production, alongside full reference implementations.
Read the corresponding book chapter after you complete a module (or whenever you want to understand the architectural design decisions and mathematical derivations in depth).
Step 3: Your first milestone
After Module 03, you can run your first milestone. It recreates Rosenblatt’s 1958 perceptron with your own tensor, layer, and activation, and it runs only the forward pass: nothing is trained yet, so the weights are random.
tito milestone run perceptron # or: tito milestone run 01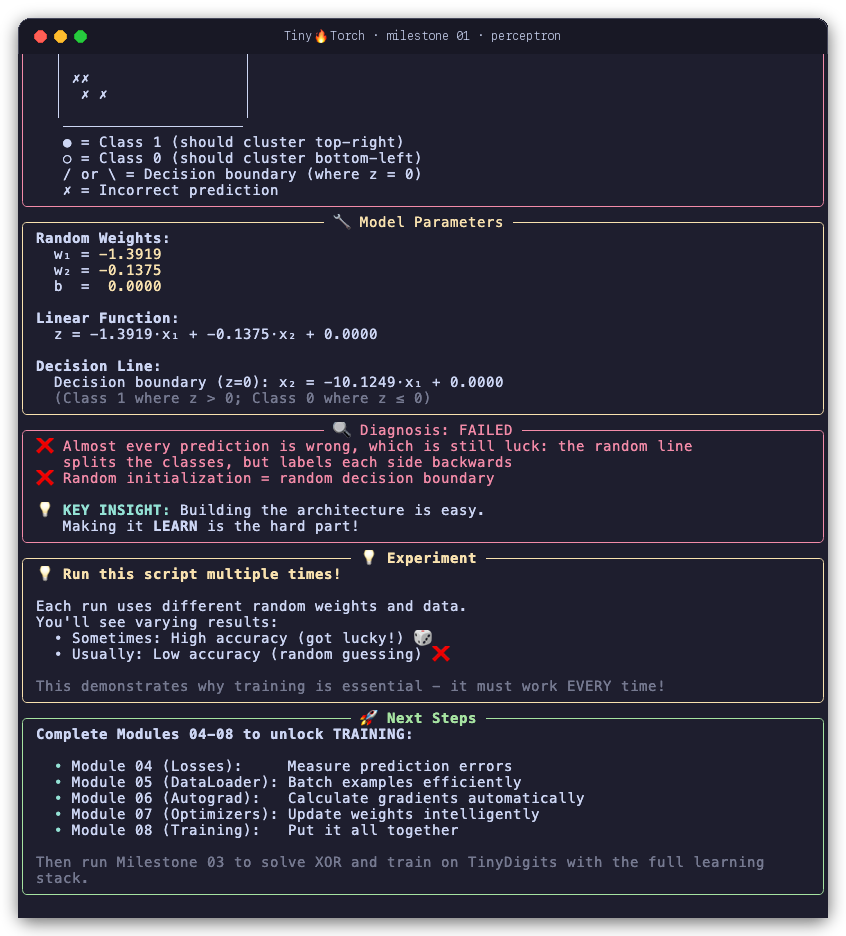
tito milestone run perceptron after completing Modules 01 through 03. The weights are random and unseeded, so your points, weights, and accuracy will differ. Because the points are separable, a random line often gets every point right or, as here, every point backwards; either way it is luck. The dim lines mark output left out of the figure.
Getting it wrong is the point of this milestone. Modules 04 through 07 add the loss, batching, gradients, and optimizer that make a network learn, and Milestone 03 shows the difference.
The Pattern Continues
Because modules are completed in order, each milestone unlocks when you finish one particular module:
| After module | Milestone | What you recreate |
|---|---|---|
| 03 | Perceptron (1958) | The first neural network, forward pass only |
| 03 | XOR Crisis (1969) | The limit of a single layer |
| 08 | MLP Revival (1986) | Backpropagation solves XOR, then learns handwritten digits |
| 09 | CNN Revolution (1998) | A convolutional network on the same digits |
| 13 | Transformer Era (2017) | Attention on sequence tasks and autoregressive TinyGPT generation |
| 19 | MLPerf to Generative Serving (2018) | Measured optimization and serving throughput of your framework |
| 17 | Custom Kernels (2024) | Your tiled, fused, and im2col kernels checked on ragged shapes, then timed against C++ SIMD, Apple Metal, and OpenAI Triton kernels |
See all milestones and their requirements:
tito milestone list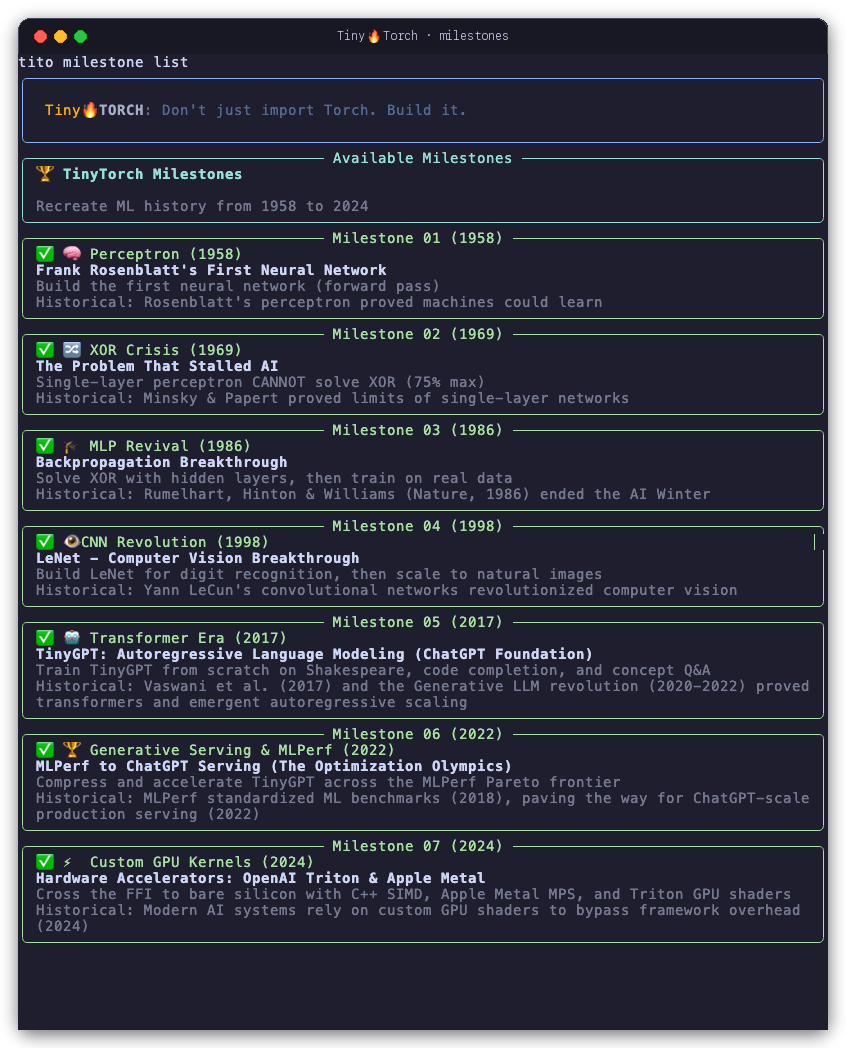
tito milestone list displays each milestone’s year, historical breakthrough, required modules, and unlocked status.
Quick Reference
Here are the commands you’ll use throughout your journey:
# Modules
tito module start <N>       # create the notebook and open it
tito module resume <N>      # reopen it later
tito module complete <N>    # test, export, and record module N
tito module status          # your progress (run inside your tinytorch folder)

# Milestones
tito milestone list         # all milestones and what each needs
tito milestone run <name>   # run one with your code

# Environment
tito system health          # check the setup
tito system update          # update TinyTorch (your work is kept)
tito --help                 # every command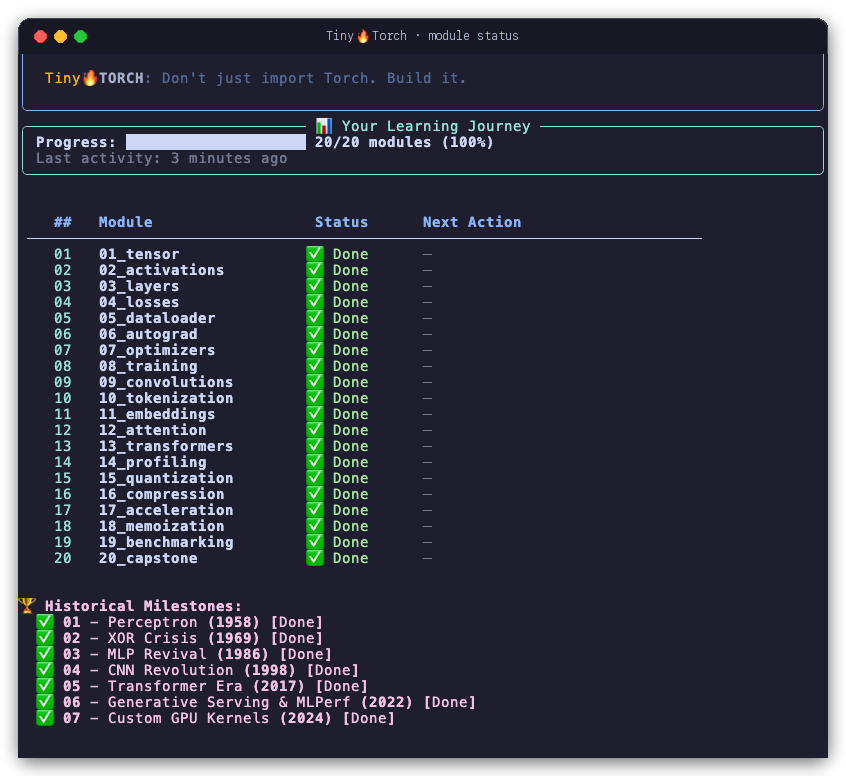
tito module status tracks progress through all 20 modules, showing ready, locked, and completed states along with your next actionable command.
The Student Workflow and Command Reference explain the complete workflow and each command in detail.
Join the Community (Optional)
After setup, join the global TinyTorch community:
tito community login # Join the communityLogin shows exactly what a sync uploads (your email as user ID, completed modules and milestones with dates, and your streak; never code) and asks whether tito may sync automatically after each completion. Set TITO_NO_SYNC=1 to keep everything local. See Community for details.
Teaching with TinyTorch
Instructors and TAs: assignment tiers, nbgrader, and grading are on the For Instructors page.